Article
How to Fix Black Bars in Photo Slideshow Videos (16:9 vs 9:16 Aspect Ratio Guide)
Mixed portrait and landscape photos cause bars or ugly crops. Blurred fill, cover and contain for 16:9, 9:16, 4:5 and 1:1 on TikTok, Reels and YouTube.
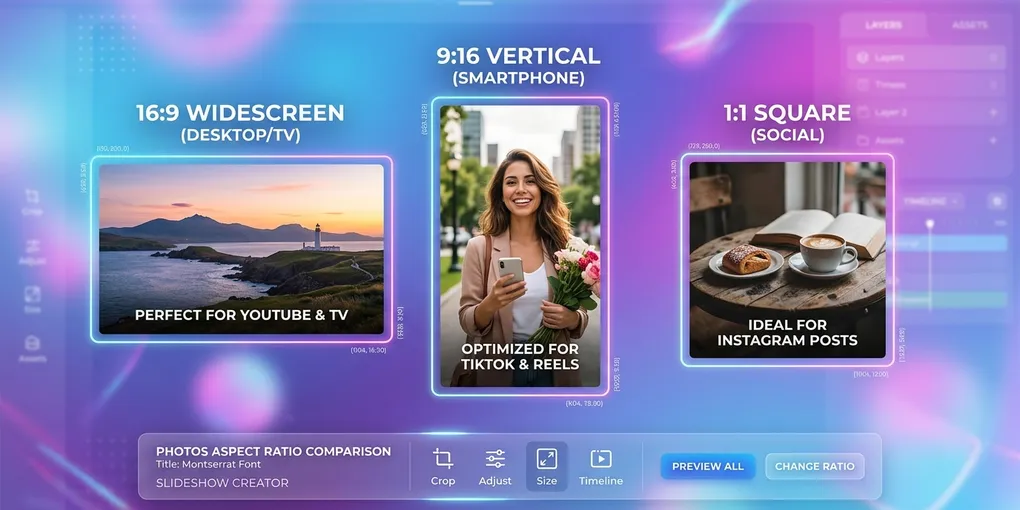
When combining widescreen photos (16:9) and smartphone portrait photos (9:16) into a single video slideshow, you almost always face a frustrating choice: accept ugly black side bars (pillarboxing), chop off heads and text with aggressive cropping, or distort your photos with unnatural stretching.
Whether you are building a travel recap, a wedding memory video, or content for TikTok and YouTube, resolving aspect ratio conflicts is essential to creating a professional-looking video. This guide explains why black bars appear and gives you simple, effective techniques to eliminate them without sacrificing your photos.
Executive Summary: Fixing Aspect Ratio Mismatches
- The Root Cause: Mixing landscape (16:9) and portrait (9:16) photos in a fixed-size video canvas creates empty padding or forced cropping.
- The Best Solution: Use Blurred Background Fill. Your photo stays 100% complete in the center, while a soft, blurred version of the same image naturally fills the background gaps.
- Quick Canvas Ratio Guide:
- 9:16 (Vertical Fullscreen): Best for TikTok, Instagram Reels, YouTube Shorts.
- 16:9 (Widescreen Landscape): Best for YouTube, TV screens, and desktop displays.
- 4:5 (Portrait Feed): Best for Instagram and Pinterest feeds (occupies more screen real estate).
- 1:1 (Square): Best for social media feeds and grid displays.
Understanding Aspect Ratios and Black Bars
1. Why Do Black Bars Appear?
Aspect ratio is the proportional relationship between a video’s width and height. When an image’s aspect ratio differs from your video canvas, your player must pad the unused space with solid color—usually black.
There are two main types of black bars:
- Pillarboxing: Vertical black bars on the left and right sides (e.g., placing a 9:16 portrait photo inside a 16:9 widescreen video).
- Letterboxing: Horizontal black bars on the top and bottom (e.g., placing a 16:9 landscape photo inside a 9:16 vertical video).
[Pillarboxing: 16:9 Widescreen Canvas + 9:16 Portrait Photo]
+------------------------------------+
| |████|                     |████| |
| |████|   [ Portrait Photo ]|████| |
| |████|                     |████| |
+------------------------------------+

[Letterboxing: 9:16 Vertical Canvas + 16:9 Landscape Photo]
+------------------+
|==================| <- Top Black Bar
|                  |
| [Landscape Photo]|
|                  |
|==================| <- Bottom Black Bar
+------------------+
2. Comparison of the 3 Image Fill Modes
To eliminate black bars, modern slideshow tools offer three main fill options:
| Fill Mode | How It Works | Key Advantages | Best Use Cases & Warnings |
|---|---|---|---|
| Blurred Fill | Duplicates and scales the image behind the original with soft Gaussian blur | Eliminates black bars while preserving 100% of the original photo composition | Recommended for most slideshows! Ideal for mixed portrait/landscape photos and group shots |
| Cover (Crop to Fill) | Scales the image to completely fill the canvas, cropping out excess edges | Fully immersive with no padding or backgrounds visible | Great for centered landscape and architecture photos; Warning: May crop heads or text near edges |
| Contain (Fit to Canvas) | Scales the image to fit entirely within the canvas with background padding | Keeps the exact original composition without blurring | Best for photography portfolios; may show black bars on social video platforms |
Step-by-Step Guide: How to Fix Black Bars in 5 Steps
With our online JPG to MP4 Studio, you can fix aspect ratio issues directly in your browser without installing heavy editing software.
[1. Upload Photos] ➔ [2. Set Canvas Ratio] ➔ [3. Choose Blurred Fill] ➔ [4. Adjust Timing] ➔ [5. Export 1080p MP4]Step 1: Upload and Arrange Your Images
- Open the JPG to MP4 Studio.
- Drag and drop your landscape (16:9), portrait (9:16), and square (1:1) photos into the timeline.
- Drag thumbnails to reorder your photos into your desired sequence.
Step 2: Select Your Target Canvas Aspect Ratio
Choose the aspect ratio matching your intended publishing platform:
- For TikTok, Instagram Reels, and YouTube Shorts, choose 9:16.
- For YouTube and TV displays, choose 16:9.
- For Instagram & Facebook feeds, choose 4:5 or 1:1.
Step 3: Enable “Blurred Fill” Backgrounds
- In the studio options, set the image fit mode to Blurred Fill.
- Notice how all portrait and landscape photos instantly gain a soft, matching background blur instead of harsh black borders.
- For select photos with centered subjects, you can optionally switch individual slides to Cover (Crop to Fill).
Step 4: Configure Slide Durations and Transitions
- Set a global duration of 2.5 to 3.5 seconds per photo.
- Select Crossfade or Slow Zoom transitions for smooth visual flow.
Step 5: Preview and Export High-Definition MP4
- Click play to preview your video.
- Select 1080p Full HD and click Export MP4. The video renders 100% locally in your browser memory.
Pro Tips and Pre-Export Checklist
1. Respect Social Media “Safe Zones”
When creating 9:16 vertical videos for mobile platforms, remember that platform UI elements cover the edges:
- Bottom 20%: Occupied by captions, usernames, and audio titles.
- Right 15%: Occupied by like, comment, and share buttons.
- Top 10%: Occupied by navigation bars and search icons.
Pro Rule: Keep key subjects and text overlays inside the central 70% Safe Zone. Using Blurred Fill automatically keeps your main photo content within this safe region.
2. Avoid Cutting Off Faces in Crop Mode
When using Cover (Crop to Fill) mode, auto-centering may cut off heads in group photos or text near top edges.
- Tip: Use Blurred Fill for off-center portraits. If you prefer full-bleed cropping, pre-crop your photos manually in your phone’s photo editor before importing.
3. Pre-Export Verification Checklist
- Canvas Ratio: Is your video ratio set correctly for your platform (9:16 vs 16:9)?
- Black Bars Check: Have harsh black borders been replaced with soft blurred backgrounds?
- Subject Visibility: Are faces and key subjects comfortably within the visible frame?
- Text Preserved: Are embedded captions and watermark dates readable?
- Pacing: Does each photo stay on screen long enough (2.5–3.5s)?
- Full Preview: Have you played the entire video to check transition smoothness?
Frequently Asked Questions (FAQ)
Q1: Why does my video look blurry after fixing aspect ratios?
A: Blurriness usually happens if you export at low resolutions (like 480p) or if your software uses low-quality scaling. Always export at 1080p Full HD or 4K. Our studio uses high-resolution canvas sampling to keep your photos and blurred backgrounds crisp.
Q2: What is the fastest way to process 50+ mixed photos?
A: Select Blurred Fill as your global setting. The converter automatically analyzes each image’s dimensions and generates matching blurred backgrounds for every photo in seconds.
Q3: Can I stretch a landscape photo to fill a vertical 9:16 screen?
A: Never stretch your photos! Distorting aspect ratios makes people look unnaturally wide or thin. Always use Blurred Fill or proportional cropping (Cover) to adapt landscape photos to vertical screens.
Q4: Are my photos private when converting online?
A: Traditional converters upload your files to remote servers. Our tool processes everything 100% locally in your browser using WebCodecs. Your photos never leave your device, ensuring total privacy.
Conclusion & Related Guides
Fixing aspect ratios and eliminating black bars doesn’t require complex video editing software. By choosing the right canvas ratio and using soft blurred backgrounds, you can make mixed photos look polished and professional.
Explore our related guides to further improve your video slideshows:
- How to Convert JPG to MP4 Complete Guide — Master photo slideshow creation and basic video conversion.
- Photo Slideshow Duration & Pacing Guide — Master slide timing and music synchronization.
- Photo to Video Quality & HD Export Guide — Learn how to export crisp 1080p and 4K MP4 videos.
- Free Online JPG to MP4 No Watermark Guide — Discover the benefits of local browser encoding.
- Video to GIF Converter Guide — Convert your slideshow videos into lightweight animated GIFs.
Ready to transform your photos into clean, border-free videos? 👉 Start Converting Photos in the JPG to MP4 Studio